Essential Steps of Waterproofing: A Comprehensive Guide
Major Steps of Waterproofing Your House in 4-Stages
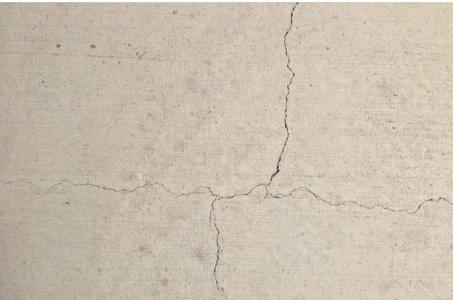
During the construction of a new house, cracks are left due to masonry errors in plastered areas like walls, and ceilings. This type of mistake is common.
These cracks later cause moisture to seep into the roof, wall joints, or ceiling surface of the house.
Due to this, despite getting expensive paint, the house has to face the problem of fungus and paint scabs.
Therefore, to avoid these problems, it is necessary to get waterproofing done during the construction of the house. Let us see the step-by-step waterproofing process of new and old houses.
Waterproofing Steps for Damaged Wall and Ceiling Before Repainting

Before painting the surface of the house in the fourth and last step, the waterproofing specialist determines the moisture by using a moisture test meter. After this, the treatment technique is used depending on the moisture content, mild, moderate, or severe.
For example - in case of mild moisture, the surface is washed with a wired brush and water.
Then two by two coatings of waterproof putty and two coatings of high-quality silicone and emulsion additives are used on the surface. This process helps to make the surface water, alkali, and salt resistant.
To protect the plastered surface from moderate or severe moisture three coatings of polymer-modified cement-based material, two coatings of waterproofing material, and two coatings of additive material need to be done.
Before painting new or old houses, it is necessary to use the above four steps of waterproofing.Although the work of waterproofing should be given priority during the construction of the new house, by taking such a decision, your house will remain new for years.
Waterproofing Steps For Terrace
In this step, prepare for waterproofing by cleaning the particles of plaster material trapped between the cracks on the surface of the roof and terrace of the house.
Thereafter leave to dry after filling with good quality Home Shield Crack Fill or two coatings of powder or as required material to fill fine cracks.
Use a mixture of polymer-modified mortar with HomeShield Advanced Latex Plus to fill in large cracks and leave to dry.
Then complete the waterproofing process by covering the roof and terrace with the help of high-quality Exterior Waterproofing Roof Guard Coating.

Waterproofing Concrete Surfaces Of The House
In the third step, repair the cracks by applying two coatings of a polymer modified mortar such as Home Shield Latex waterproofing material to fill the cracks on all types of concrete surfaces.
Then plaster the concrete surface with plaster material prepared by mixing Advanced Latex Plus waterproofing material with cement, sand, and water.

Waterproofing Steps During Construction Work

In the process of waterproofing during the construction of the house, a mixture prepared from the appropriate proportions of cement, sand, and waterproofing compound is used.
This mixture is used for plastering all brickwork and cement works, pillars and foundations, roof slabs, renderings, basements, etc. This helps to firmly fill the cracks left during plastering.
Conclusion
We provide all types of Home Improvement and Home Decor Services given below:
ColorDrive - Online Professional Home Improvement and Home Decor Service Provider like Interior Home Painting, House Exterior Painting, Rental Painting, House Waterproofing Solutions, House Deep Cleaning, Building Sanitization, Wall Texture Painting, Wall Exterior Texture, Paint Stencil Design, Wall Paint Design, Provides all service like Kids Room Decor, House Wallpaper Design, House False Ceiling Work, POP Work, House Coloring Solutions, Color Consultancy, and Wall Free Hand Art Design Work.
Upto 25% OFF On Home Painting!
* Share details for Free Online-Quotation
ONE year service warranty