Step-by-Step Home Wall and Ceiling Design Painting Guide

Step-by-Step Home Wall and Ceiling Design Painting Guide


While starting inside the house ceiling and walls of the room first paint the trims, then the ceiling, and finally the walls. Painting in this order is necessary because it is easier to tape trim than to tape down walls.

When painting trim, it is important to focus more on painting the surface to be painted evenly. If the color spreads around it, it can be corrected while painting the walls.
After the painting of the trim is completed, it should be left to dry for at least a whole day. After drying the paints should be covered with the help of painter's tape.
After this, dust mites or paint splatters during the interior painting of the ceiling can be corrected while painting the walls. Keeping the above things in mind, let's start the process of painting the ceiling and walls.

Table of Content

  1. Surface Preparation for Painting
  2. Materials Required for Painting
  3. Primer for Ceiling and Walls
  4. Trim Painting Process
  5. Ceiling Painting Process
  6. Wall Painting Process
  7. Removing Trim Tape
  8. Tips for Painting Walls

Surface Preparation for Painting

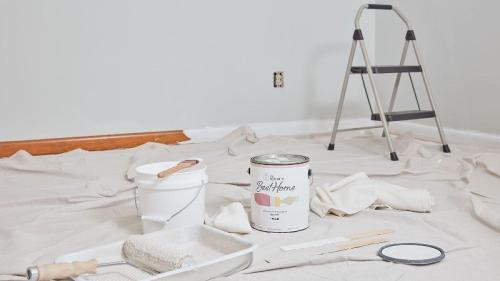
  • If possible, remove all furniture from the room. Cover the windows, doors, and cupboards of the room with plastic sheets to protect them from dust and paint splatters.
  • Remove and disassemble removable ceiling fixtures or cover with painter's tape.
  • Scrub the surface of the ceiling and walls with sandpaper to clean off the excess dust mites and the layer of hollow plaster.
  • Next, wipe off the excess dust from the surface to be painted with a sponge or soft cloth.
  • Then repair cracks, holes, etc. on the ceiling and walls.
  • Then cover the floor with a drop cloth/plastic sheet.

Materials Required for Painting

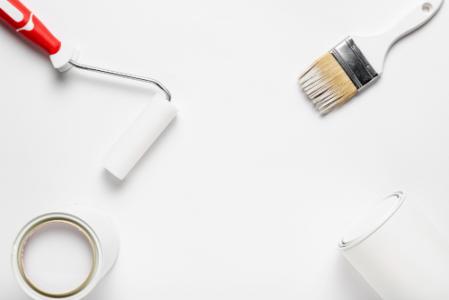
  • Paint Bucket / Roller Pan
  • paint conditioner
  • Primer
  • Sandpaper
  • Spackling Compound / Putty
  • Pants Roller Tool
  • pants brush
  • Step stool
  • painter's tape
  • Paintbrush 1-1/2 inches or 2 inches (for painting trim)
  • putty knife

Primer for Ceiling and Walls

  • Using a roller tool, apply a coating of latex paint primer to cover blemishes on the ceiling surface.
  • Use interior latex drywall primer if the ceiling surface is smooth or for a lightly designed ceiling.
  • Use HighBuild Primer for textured ceiling surfaces.
  • Leave to dry after applying two coats of primer to the ceiling and walls.
  • Then use putty to remove the plaster imperfections from the ceiling and the surface of the walls.


Trim Painting Process

  • First, start by painting the decorative textured surface/trim on the ceiling and walls.
  • Paint the trim surface with a 1-1/2-inch or 2-inch-wide brush as needed, depending on the textured surface.
  • Leave the paint for at least a full day to dry. Then cover the trim with painter's tape.

Ceiling Painting Process

  • It is better to use a paint roller tool to paint the ceiling.
  • To achieve an even painting, the entire surface of the ceiling should be painted by dividing it into sections of 3-4 square feet.
  • For a smooth, even-textured ceiling, a roller tool with a low nap should be used.
  • For a designed texture ceiling, use a roller tool with a 1/2 or 3/4 inch fluffy roller nap.
  • In the process of painting, use a roller pan for loading the paint in the roller and roll on the ceiling surface slowly.
  • begin rolling the paint roller tool through the wet ends of the squares.
  • Keep changing the direction of your rolling, as a perfectly straight roll can leave overlap marks.
  • Continue to blend the paint with the previous section as you paint, rotating the paint roller until the ceiling is complete.
  • Repeat the process to finish the painting process of the entire ceiling.

Wall Painting Process

  • While painting the wall Roll the roller back and forth across the wall in a series of V- or W-shaped strokes, roll the roller tool from top to bottom, until the section is completely covered.
  • Before reloading the roller and moving on to the next section, roll over the area you just painted in a smooth continuous stroke from top to bottom.
  • To avoid leaving marks of paint on the surface go on repeating the above painting process. This method will make it possible to spread the paint evenly on the surface of the wall.
  • The roller should be lifted lightly after moving the paint roller over the already painted area, otherwise, there may be a risk of streaks of paint on the painting surface.
  • Using this process, the entire surface of a wall should be fully painted at once.
  • After one coating of paint is completed, leave it to dry completely for at least 4 hours.
  • Then following the above painting method complete the work by painting the second coating of paint.

Removing Trim Tape

  • Once the paint dries, the tape should not be pulled off the trim easily.
  • Because the paint forms a film between the wall and the tape, just pulling off the tape at once from the surface, there may be a risk of dry pieces of paint peeling off the surface together with tape.
  • The best way of removing tape from the trim is first loosening the tape from the surface.
  • For this process, you may need to wait about 24 hours after the painting process is complete for the paint to dry completely.
  • Then use a sharp knife or box cutter knife to cut away the film between the paint and the tape.


Tips for Painting Walls

  • Before starting the interior painting process of the walls, buy an estimated gallon of paint according to the requirement.
  • To paint the walls of the room, mix the paint in one go, as mixing paints for painting again may result in a difference in the color shade of the walls.
  • Use a bucket and roller screen instead of a roller tray to paint a larger surface. Using a bucket and roller screen to load the paints allows for faster painting than using a roller pan.
  • After dipping the roller into the paint bucket, hold the roller tool over the roller screen to drip off excess paint, when the paint stops dripping, start painting.
  • This process will help paint more surfaces at a time.
  • While painting walls, do not allow the edges of the painted surface to dry out to avoid streaks of paint.
  • Begin moving the paint roller through the wet ends of the grid, and continue to run the second stroke of the paint roller tool, rolling the roller from the wet edges of the previous grid.
  • By following the up and down rolling process, continue moving the paint roller tool up to the entire height of the wall.
  • Keep the open side of the roller frame facing the previously painted area. This puts less pressure on the exposed part of the roller, which helps spread paint evenly over the surface.

Conclusion:

To get the service of our professional painter, you can contact on the following address:

We provide all types of Home Improvement and Home Decor Services given below:
Colordrive - Online Professional Home Improvement and Home Decor Service Provider like Interior Home Painting, House Exterior Painting, Rental Painting, House Waterproofing Solutions, House Deep Cleaning, Building Sanitization, Wall Texture Painting, Wall Exterior Texture, Paint Stencil Design, Wall Paint Design, Provides all service like Kids Room Decor, House Wallpaper Design, House False Ceiling Work, POP Work, House Coloring Solutions, Color Consultancy, and Wall Free Hand Art Design Work.

You can contact on below mobile number for painting and home decor service in all major cities of India like Bangalore, Mumbai, Hyderabad, Pune, Delhi, Bhopal, Indore, etc. before 8 pm:

Mobile number: 09014182316


09-Feb-2023
3,583 View(s)

More Related Posts: